Administration Guide
A walkthrough of setting up a new tenancy end to end: create the tenant, create a client for it, enable notifications, then confirm the API gateway actually works. Each step depends on the one before it.
1. Create the Tenant
Go to the Portal UI and log in with the global administrator account (administrator@templatefirm.com).
- Navigate to Admin, Tenants from the sidebar menu.
- Click "+" to add a new Tenant.
- Fill in the required information and click Save.

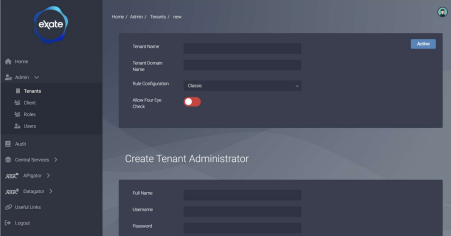
Choosing how the tenant's services are configured
Go to the Vault UI and log in with the Tenant Administrator created above. There are two configuration options for Tenant services:
- Tenants can share the same REST services.
- Tenants can be assigned their own REST service endpoints for process isolation.
These are controlled by the exateportal environment variable in values.yaml: IS_EXECUTION_CONTEXT_ENABLED. true enables dynamic endpoint configuration; false uses system-configured REST endpoints. If you want dynamic endpoint configuration, follow Create the Zone and Create the Namespace below, otherwise skip them.
Create the Zone
Creates the default zone for the Tenant. Navigate to Zones from the sidebar menu, click "+", fill in the required information, and Save.
Create the Namespace
Creates the namespace and associated endpoints for the Tenant.
- Navigate to Namespace from the sidebar menu, click "+", fill in the required information, and Save.
- Add a new Discovery endpoint, value set to the tenant's ingress host.
- Add a new ETL API endpoint, same ingress host.
- Add a new APIgator API endpoint, same ingress host.
All hosts configured above should use HTTPS with a trailing slash, for example https://discovery-api.host.com/.
Create Users
Additional user accounts for the Tenant.
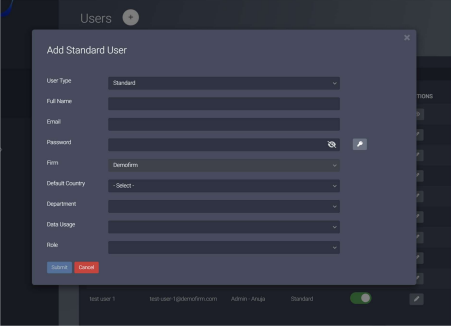
- Go to the Portal UI, navigate to Admin, Users.
- Click "+", fill in the required information, Save.
There are three user types: Execution (system accounts), Invite (invites a user to the platform, requires SMTP configuration), and Standard (credentials for the new user specified directly).
2. Create a Client
- Navigate to Admin, Client from the sidebar menu.
- Click "+" to add a new Client.
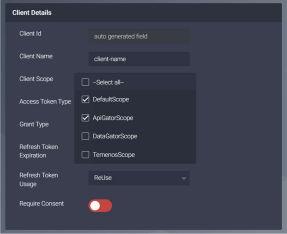
- Fill in the required information.
- Ensure Client Scope includes
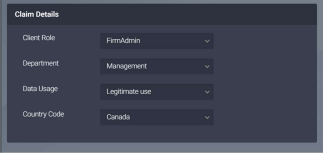
DefaultScopeandApiGatorScope(see the Client Details screenshot below). - Ensure Client Role is set to
FirmAdmin(recommended, see the Claim Details screenshot below). - Click Save.
3. Enable Notifications
Go to the Vault UI, log in with the Tenant Administrator you want to enable notifications for.
Add the Entitlement System Configuration
- Navigate to System Config, click "+".
- Choose Key
EntitlementTenancy, Submit. - Click "+" again, choose Key
EntitlementNotification, Submit.
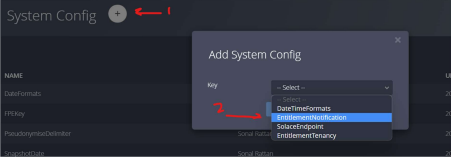
Then edit the EntitlementNotification record (pencil icon), click "+" to add a record, and ensure the toggle for SupportEntitlementNotification is on.
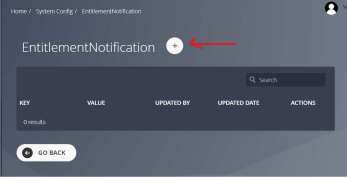
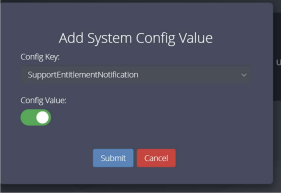
Add a Solace Endpoint
- Navigate to Data Sources, API Connection, Solace.
- Click "+", fill in the Solace instance name and connection details.
- Click Test Connection, then Save once successful.
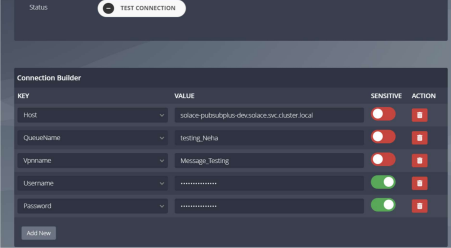
Add and edit the Solace System Configuration
- Navigate to System Config, click "+", choose Key
EntitlementTenancy, Submit. - Edit the record (pencil icon), click "+" to add a record, set the Value to the Solace Endpoint configured above, Submit.
4. Test the API Gateway
With the tenant, client, and notifications all configured, confirm the gateway actually works.
Check endpoint connectivity
Open this URL in a browser, replacing <HOSTNAME> with your instance:
https://<HOSTNAME>/health
A successful connection returns:
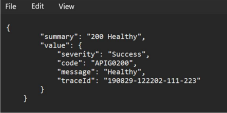
Get a token
curl --location 'https://<HOSTNAME>/apigator/identity/v1/token' \
--header 'X-Api-Key: <API KEY>' \
--header 'Content-Type: application/x-www-form-urlencoded' \
--data-urlencode 'client_id=<CLIENT ID>' \
--data-urlencode 'client_secret=<CLIENT SECRET>' \
--data-urlencode 'grant_type=client_credentials'
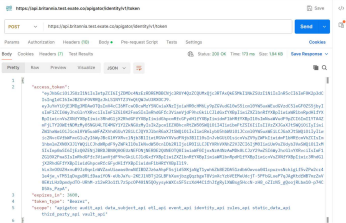
A successful response looks like:

With a token in hand, the tenancy is fully set up and ready to use, see the API Guide for authenticating and calling the Execution or Management APIs day to day.